To keep your home studio organized without cable spaghetti, choose a high-quality audio interface suited to your needs, and consider wireless options for devices and speakers. Use cable management accessories like clips, Velcro straps, and labels to bundle and route cables neatly. Invest in versatile power strips with surge protection and position your equipment thoughtfully to optimize sound and space. Incorporating space-saving monitors and multifunction gear ensures a streamlined setup. Keep exploring for more tips to achieve a clutter-free, professional studio environment.
Key Takeaways
- Choose an audio interface with sufficient inputs, high preamp quality, and low latency for reliable recording.
- Implement wireless adapters, Bluetooth transmitters, and cable management accessories like clips and Velcro straps to reduce cable clutter.
- Use surge protectors with proper power rating and safety features to safeguard equipment and maintain safety.
- Position monitors at ear level, use stands or mounts, and optimize placement for accurate sound without clutter.
- Incorporate acoustic treatments and compact monitors to enhance sound quality while saving space.

Cable Management, 25.3'' Under Desk Cable Management Tray No Drill, Metal Cable Organizer with Clamp for Wire Management, Cord Organizer for Home Office, Desk Accessories Organizer, Black
【Effortless No-Drill Installation】This under desk cable management tray requires no tools or drilling—simply clamp it securely to any…
As an affiliate, we earn on qualifying purchases.
As an affiliate, we earn on qualifying purchases.
Choosing the Right Audio Interface
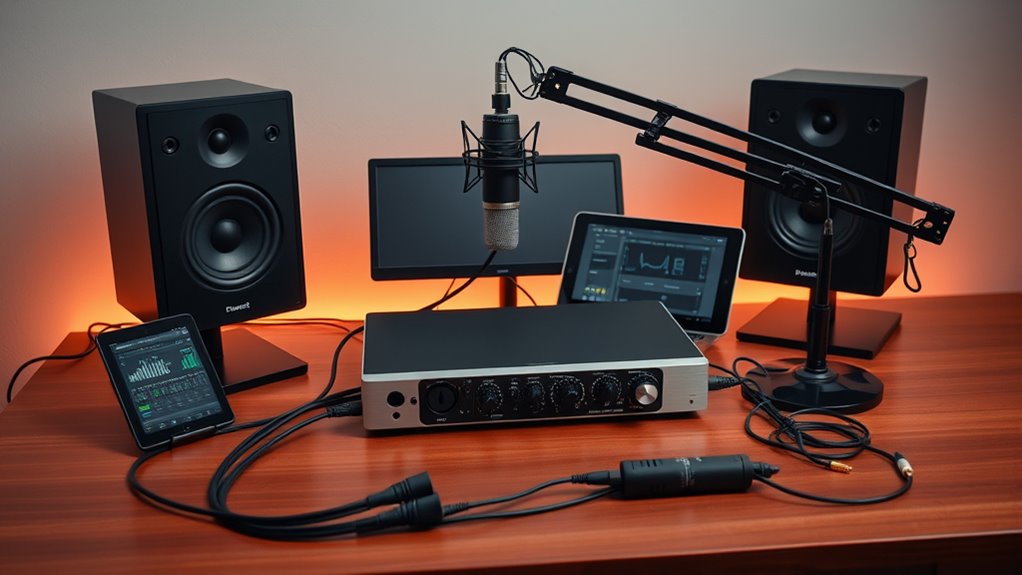
Choosing the right audio interface is essential for capturing high-quality sound in your home studio. You need to evaluate the audio interface features that matter most to your setup, such as the number of inputs and outputs, preamp quality, and latency. Connection compatibility is equally important; verify the interface supports your computer’s ports (USB, Thunderbolt, or FireWire) and matches your workflow. If you’re working with multiple instruments or microphones, opt for an interface with enough channels. Additionally, check if it’s compatible with your recording software. A well-chosen interface simplifies your recording process, reduces technical issues, and ensures clear, professional sound. Consider the quality assessment of the components to ensure durability and reliability over time. The design and build quality can also influence the longevity and performance stability of your device. Take your time to compare models, focusing on features that align with your creative goals and existing gear. Ensuring the compatibility of your audio interface with your equipment can prevent frustrating setup problems and improve overall performance. Paying attention to latency performance can significantly impact your recording experience by reducing delays and syncing issues. Furthermore, selecting an interface with robust construction can help withstand the demands of regular use and transportation.

Focusrite Scarlett Solo 3rd Gen USB Audio Interface for Guitarists, Vocalists, Podcasters or Producers to record and playback studio quality sound
Pro performance with great pre-amps – Achieve a brighter recording thanks to the high performing mic pre-amps of…
As an affiliate, we earn on qualifying purchases.
As an affiliate, we earn on qualifying purchases.
Opting for Wireless Connectivity Options
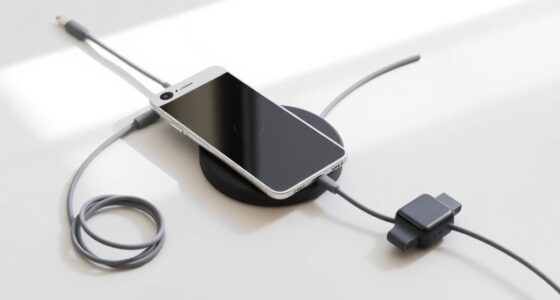
Ever considered how wireless connectivity can streamline your home studio setup? Wireless adapters are a great way to eliminate tangled cables, allowing you to connect your audio devices hassle‑free. These adapters can turn your wired gear into wireless units, freeing up space and reducing clutter. Bluetooth transmitters are another useful option, letting you wirelessly send audio signals to speakers or headphones without sacrificing quality. When choosing wireless options, assure your adapters support low latency to avoid delays in playback or recording. They’re especially handy for connecting keyboards, microphones, or monitors without running cables across your workspace. By integrating wireless adapters and Bluetooth transmitters, you create a cleaner, more flexible studio environment—making your workflow smoother and your space less cluttered. Additionally, selecting appropriate wireless technology ensures stable connections and optimal sound quality for your recordings and monitoring. Understanding wireless navigation and mapping can help you position devices for the best signal strength and minimal interference, enhancing overall performance. Incorporating knowledge of collagen and hyaluronic acid benefits can further improve your setup by ensuring the longevity and clarity of your equipment and accessories.

Vondynote Set of 2 Desktop Clamp Speaker Stands Short Studio Monitor Stands Height Adjustable
Short Stand:PLEASE NOTED that the height adjustment range of the stand is 9"/23 cm to 14"/35 cm,the speakers…
As an affiliate, we earn on qualifying purchases.
As an affiliate, we earn on qualifying purchases.
Using Cable Management Accessories
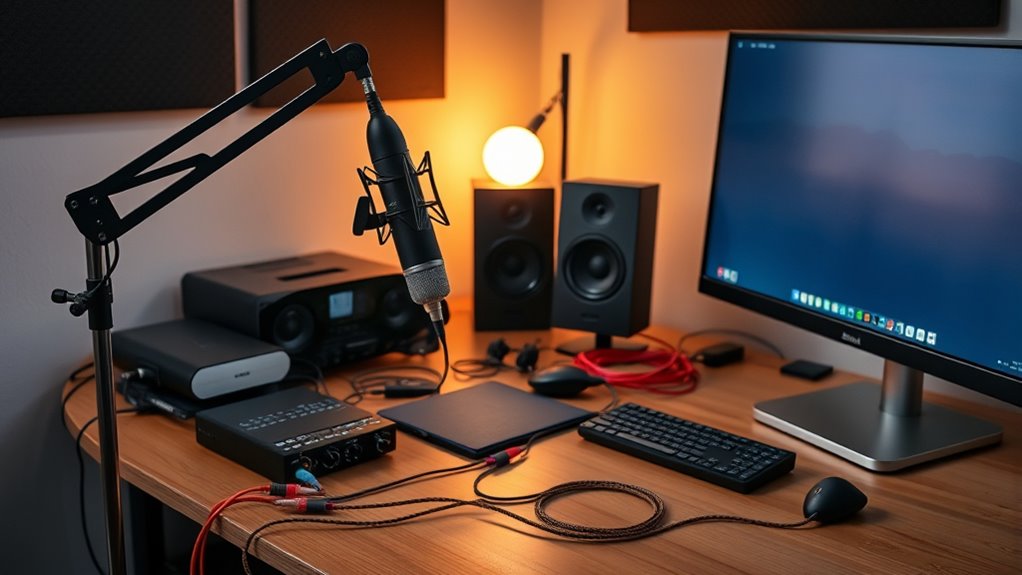
Using cable management accessories helps keep your studio neat and efficient. Cable clips hold cords in place and prevent tangling, while Velcro straps allow you to bundle cables for easy handling. Incorporating these tools makes setup faster and minimizes clutter. Proper paint sprayer tips can also improve your workflow by ensuring consistent application and reducing the need for touch-ups. Additionally, effective AI security technologies can protect your digital studio environment from cyber threats, ensuring your data stays safe. Remember to also consider wire organization strategies to further streamline your workspace and enhance productivity, as understanding sound healing science can inspire calming elements within your environment. Exploring dog names can also add a personal touch to your workspace, making it more inviting and inspiring.
Organize With Cable Clips
To keep your home studio organized and clutter-free, cable clips are an essential accessory that can make a big difference. They help secure cables neatly along desks or walls, preventing tangles and accidents. Use cable clips with labels or color coding systems to easily identify which cable is which, saving you time during setup or troubleshooting. Here are some ways to maximize their effectiveness:
- Attach clips close to your equipment for quick access.
- Use different colors to designate audio, power, or data cables.
- Label cables with cable labeling tags for added clarity.
- Route cables along designated paths to maintain a tidy setup.
- Opt for cable clips made with hydrocolloid material to ensure gentle yet effective grip without damaging delicate cables or surfaces. This material also provides moisture resistance, which can help protect your cables in humid environments. Additionally, choosing clips with flexible materials can accommodate various cable sizes and reduce strain on the cables and connectors. Incorporating adjustable clips can further enhance flexibility, allowing you to easily modify your cable management as your setup evolves. Using durable materials ensures that your cable clips will hold up over time even with frequent adjustments.
These simple steps keep your cables accessible and organized, reducing clutter and making your workflow smoother.
Use Velcro Straps
Velcro straps are a versatile tool for maintaining a tidy home studio setup. They allow you to bundle cables neatly, reducing clutter and preventing tangles. Use them to secure cables along desks, racks, or behind equipment, keeping everything in place. Incorporate cable labeling and color coding by attaching small tags or color-coded Velcro strips, making it easier to identify connections at a glance. This system streamlines troubleshooting and setup, saving you time. Unlike tape or zip ties, Velcro straps are reusable and adjustable, so you can add or remove cables effortlessly. Proper cable management techniques and organization with Velcro straps can also improve cable durability and prevent damage caused by tangles or strain. Additionally, using cable management accessories like Velcro straps can extend the lifespan of your cables by reducing wear and tear. It’s a simple upgrade that makes a big difference in your studio’s organization.

Power Strip, ALESTOR Surge Protector with 12 Outlets and 4 USB Ports, 6 Feet Extension Cord, 2700 Joules, ETL Listed, Black
★Multi Function Power Strip: Power strip surge protector with 12AC outlets & 4 USB charging ports, 6-foot Heavy…
As an affiliate, we earn on qualifying purchases.
As an affiliate, we earn on qualifying purchases.
Selecting Versatile Power Strips and Surge Protectors
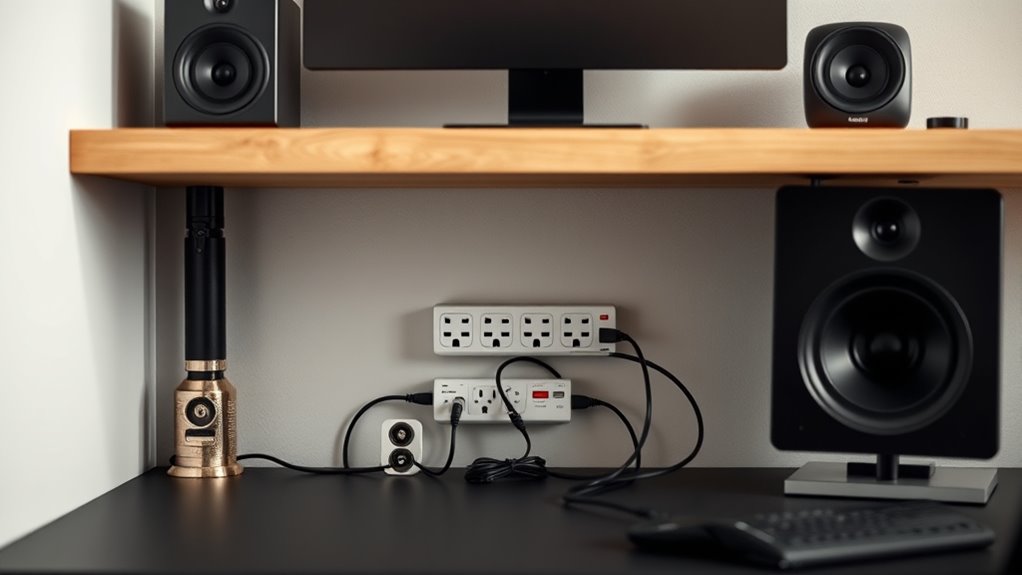
When choosing power strips and surge protectors, make sure they can handle the power load of all your devices to prevent overloads. Check that outlets are easily accessible and well-placed to keep your setup organized and safe. Prioritizing safety features and thoughtful placement helps keep your studio running smoothly. Additionally, selecting properly rated surge protectors can help safeguard your equipment from unexpected power surges. It’s also important to consider the types of cookies used on the site to understand how your data might be tracked and used for site performance analysis.
Power Capacity and Safety
Choosing the right power strips and surge protectors is essential for making sure your home studio runs safely and efficiently. To prevent overloads and electrical hazards, consider these factors:
- Check the total power capacity (amps/watts) to match your equipment’s needs.
- Look for grounding safety features to avoid electrical shocks.
- Ensure the surge protector offers voltage regulation to protect against power surges.
- Opt for models with built-in circuit breakers for added safety during overloads.
Port Accessibility and Placement
To make certain your home studio remains organized and accessible, consider how your power strips and surge protectors are positioned and how their ports are arranged. Place them where you can easily reach them without stretching or bending, especially when adjusting keyboard placement or monitor height. Avoid blocking essential ports with bulky plugs; opt for models with multiple outlets and wide spacing to accommodate larger adapters. Position surge protectors near your workspace, so connecting devices like microphones or audio interfaces is quick and hassle-free. Keep cords tidy by using strips with accessible outlets that prevent cable spaghetti. This setup ensures you can adjust your keyboard and monitor without hassle, maintaining a clean, efficient workspace that’s both safe and easy to use.
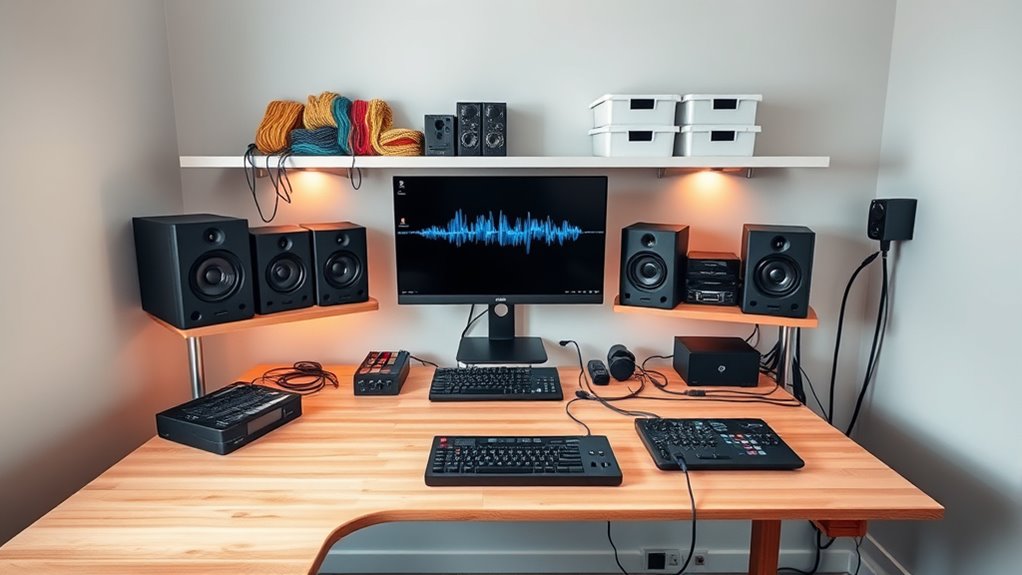
Incorporating Compact and Multi-Function Equipment

Incorporating compact and multi-function equipment into your home studio can substantially streamline your setup and boost your efficiency. Instead of cluttered cables and multiple devices, choose gear that combines functions and saves space. For example:
- Use a wireless microphone for mobility and quick setup without tangled cords.
- Invest in a multi-purpose controller that handles mixing, effects, and routing from a single device.
- Opt for all-in-one audio interfaces with built-in preamps and monitoring controls.
- Select compact monitor speakers that deliver high-quality sound without taking up excessive space.
These choices help minimize cable clutter while maximizing your studio’s versatility, making your workflow smoother and more organized. Focused gear like these allows you to work more efficiently and keep your setup clean.
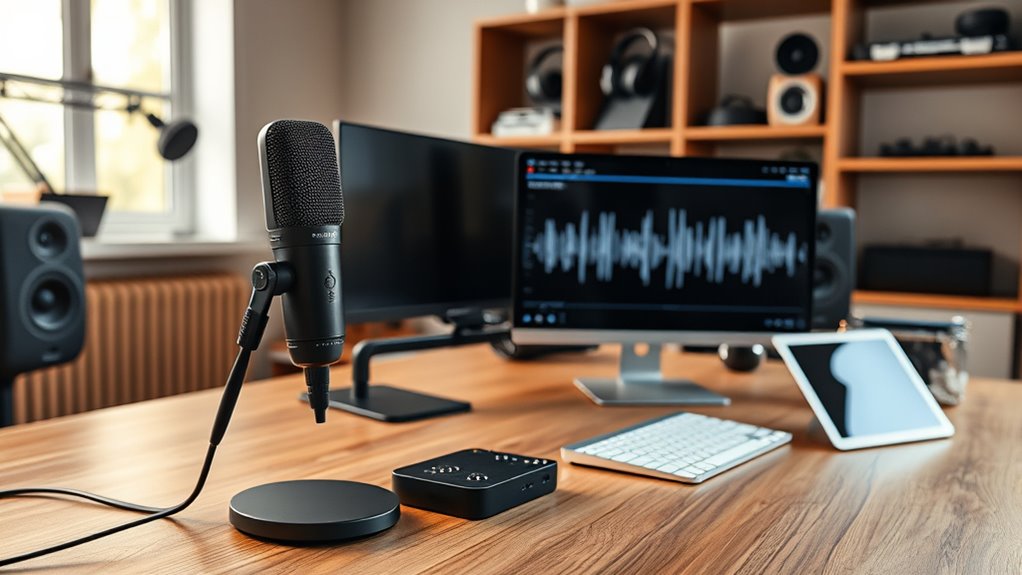
Implementing Organized Routing Systems
A well-organized routing system is essential for managing your home studio’s signal flow efficiently. Start by creating a clear routing diagram that maps out how each device connects. This visual guide helps you understand your signal path and simplifies troubleshooting. Use cable labeling to mark each cable clearly, indicating its purpose and connection points. Labeling prevents confusion and saves time during setup or adjustments. Keep your cables neatly bundled and routed along designated pathways to avoid clutter. Regularly update your routing diagram as your setup evolves, ensuring it remains accurate. Implementing these practices keeps your studio tidy, improves workflow, and reduces signal issues caused by tangled or misconnected cables. An organized routing system becomes the backbone of a smooth, professional-sounding home studio.
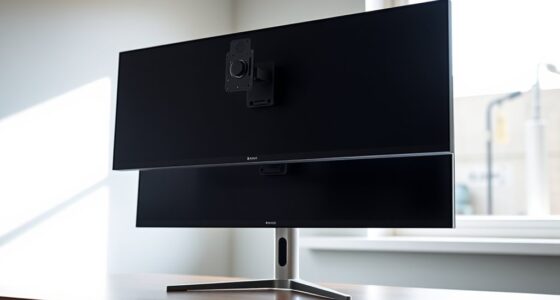
Investing in Quality, Space-Saving Monitors
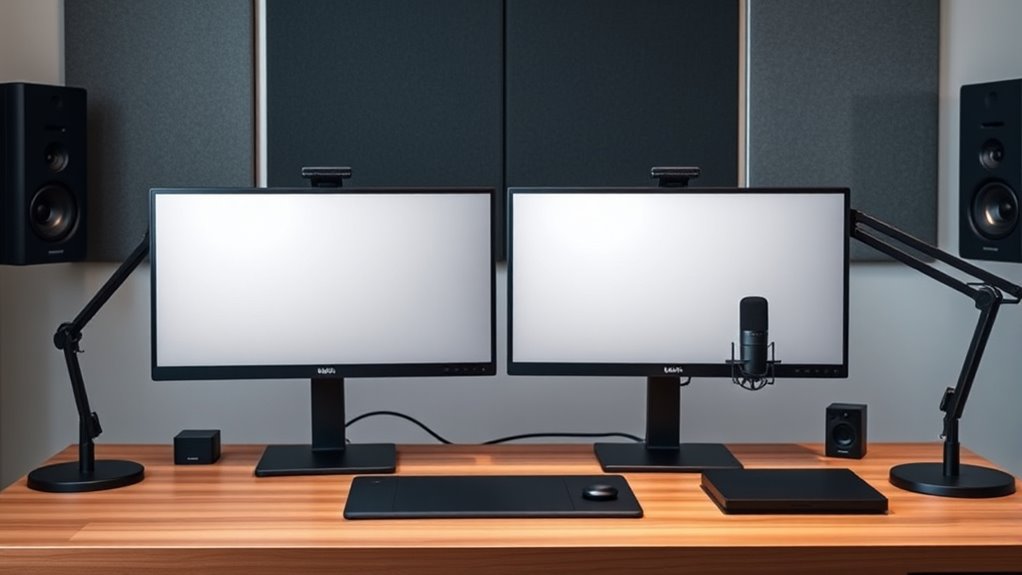
Investing in quality, space-saving monitors is a crucial step toward achieving accurate sound reproduction in your home studio. Proper monitor placement is key—position them at ear level, equidistant from your listening position, and avoid placing them too close to walls. Acoustic treatment enhances clarity by reducing reflections and standing waves, making your monitors’ output more precise. Here are four tips to maximize your setup:
Proper monitor placement and acoustic treatment are essential for accurate sound in your home studio.
- Use monitor stands or wall mounts to save space and optimize placement.
- Incorporate bass traps and diffusers to improve room acoustics.
- Keep monitors away from corners to prevent bass buildup.
- Regularly check and adjust monitor positioning for the best soundstage.
Investing in quality monitors with thoughtful placement and acoustic treatment ensures your mixes translate accurately.
Frequently Asked Questions
How Do I Choose the Best Wireless Options for My Studio?
To choose the best wireless options for your studio, focus on wireless audio quality and Bluetooth connectivity. Look for devices with high-resolution audio support and low latency to guarantee clear sound and minimal delay. Check compatibility with your existing gear, and prioritize brands known for reliable wireless performance. Testing different options can help you find the perfect balance between convenience and sound quality, making your studio setup seamless and efficient.
What Are the Most Effective Cable Management Accessories for Small Spaces?
You can keep your small studio tidy with cable labels and cable sleeves. Use cable labels to easily identify each cable, preventing confusion and saving time. Wrap cables in cable sleeves to protect them and reduce clutter. Combining these accessories helps you organize efficiently, making your workspace cleaner and more functional. With this setup, you’ll quickly find what you need and maintain a neat, professional-looking studio environment.
Which Power Strips Prevent Equipment Interference and Ensure Safety?
Think of a power strip as the guardian of your equipment’s safety and clarity. Choose one with built-in surge protection and proper grounding to prevent interference and shield against power surges. Look for models that feature safety shutters and overload protection, ensuring grounding issues are minimized. By selecting a reliable power strip, you create a stable, interference-free environment that keeps your gear protected and your studio running smoothly.
How Can I Optimize Monitor Placement for the Best Sound Quality?
You should position your monitors at ear level, forming an equilateral triangle with your listening position. Keep them away from walls to reduce reflections, and use acoustic treatment like bass traps and diffusers to improve sound clarity. Adjust the speaker positioning until you notice a balanced, natural sound. Regularly check your setup with test tracks, ensuring your monitors deliver the most accurate sound for mixing and recording.
Are There Multi-Function Devices That Reduce the Need for Multiple Gadgets?
You’ll find that all-in-one devices simplify your setup, reducing clutter and boosting efficiency. Coincidence brings compatible gear together, making device compatibility seamless. These multi-function gadgets combine audio interfaces, MIDI controllers, and monitors, so you don’t need separate units. By choosing versatile, compatible gear, you streamline your workflow, save space, and focus more on creating. This smart approach keeps your studio organized and ready for any project.
Conclusion
With these tech essentials, your home studio will transform into a sleek, clutter-free haven. Think of your setup as a well-orchestrated symphony, where every cable and device plays in harmony. No more tangled spaghetti—just smooth, professional sound flowing effortlessly. Embrace these smart choices, and watch your creative space blossom into a powerhouse of productivity and inspiration. Your perfect studio is just a few organized steps away—ready to make music without the chaos.